Install a VPN for Android on your phone to protect your privacy and access restricted websites. This article will guide you through the quick setup step by step!
 |
Quick guide to using VPN on Android phones
Using a VPN on your Android phone is quick and easy. With just a few simple setup steps, users can activate a private network connection to protect personal data and access restricted content.
How to install VPN for Android phone effectively
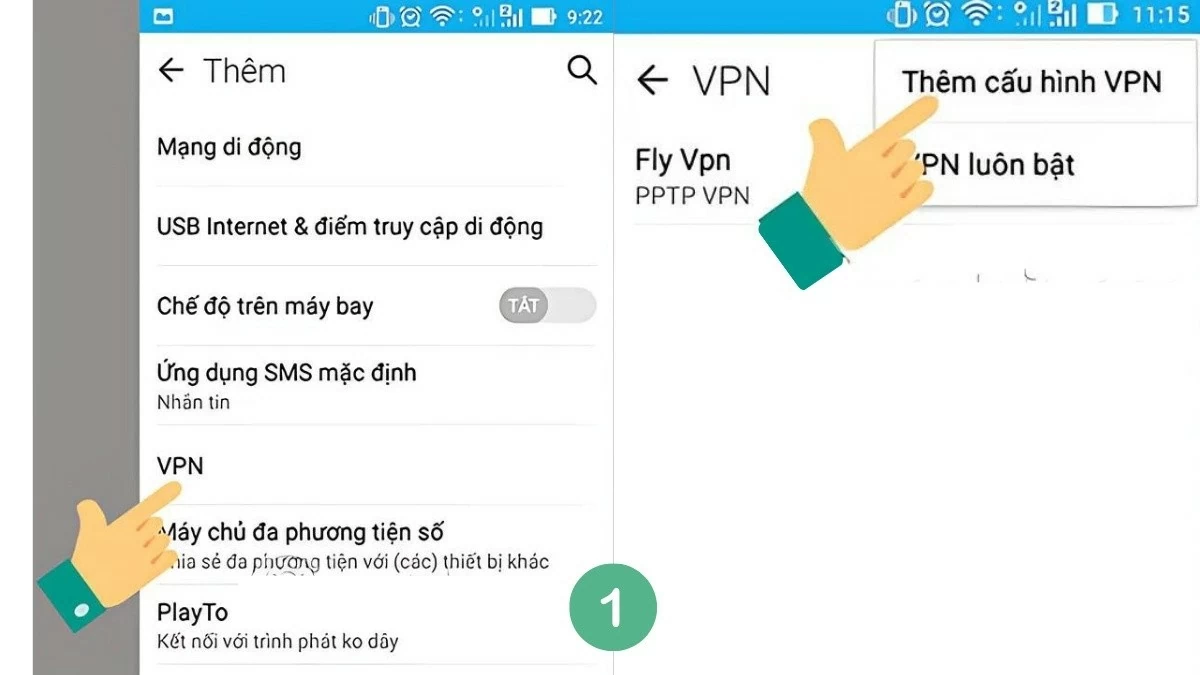
Step 1: Set up a new VPN. First, from the home screen, go to Settings, then manage Other wireless connections and tap VPN. Next, select "Add VPN configuration" (or tap the "+" icon on some Android devices) to start the adding process.
 |
Step 2: Next, enter the server information.
- Name: Enter an optional network name.
- Server Address: Provides the address of the VPN server, which can be easily found on the internet.
After filling in all the information, click "Save" to save and return to the list of previously created virtual networks.
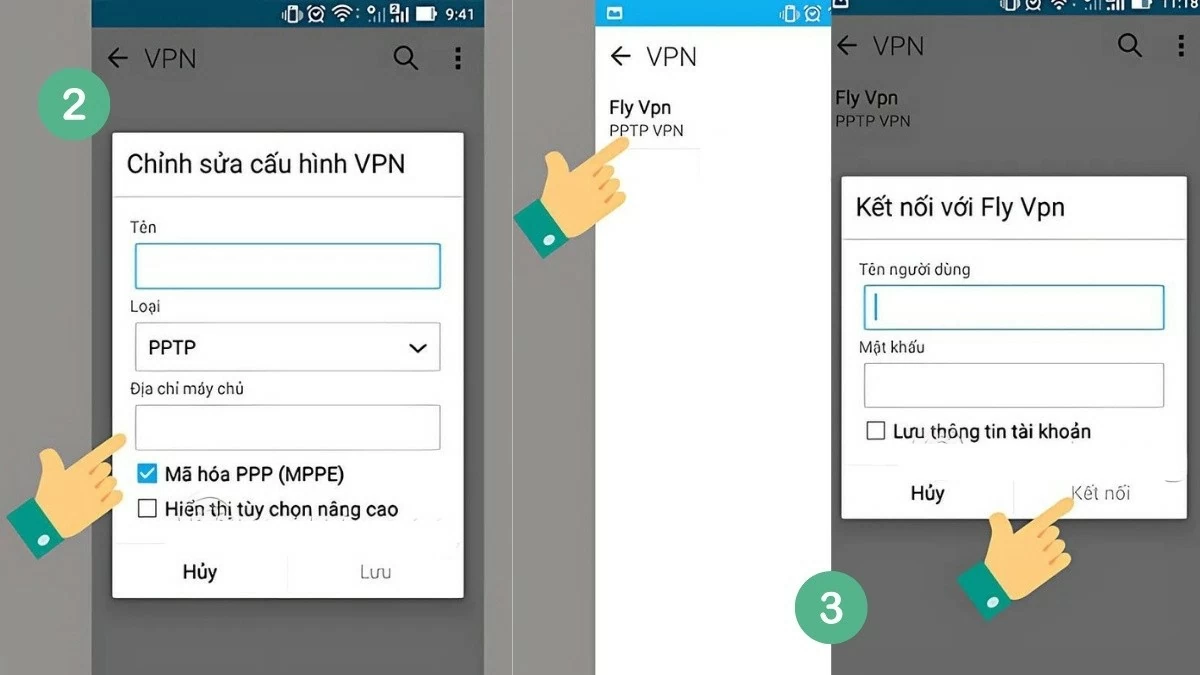 |
Step 3: Provide information. Select the VPN network you just installed and enter the connection information. The device will ask you to enter the name and password from the provider.
For example, with pptpvpn.org, the information to enter is:
- Username: pptpvpn.org
- Password: 1647
Then, make the connection to complete the VPN installation for Android phone.
Above is a simple way to use VPN on the phone that users can easily do.
How to Disconnect VPN on Android Super Easy
Currently, Android does not have a built-in VPN feature, so users need to download a third-party application. However, disabling VPN is very easy, just do it in the installed application.
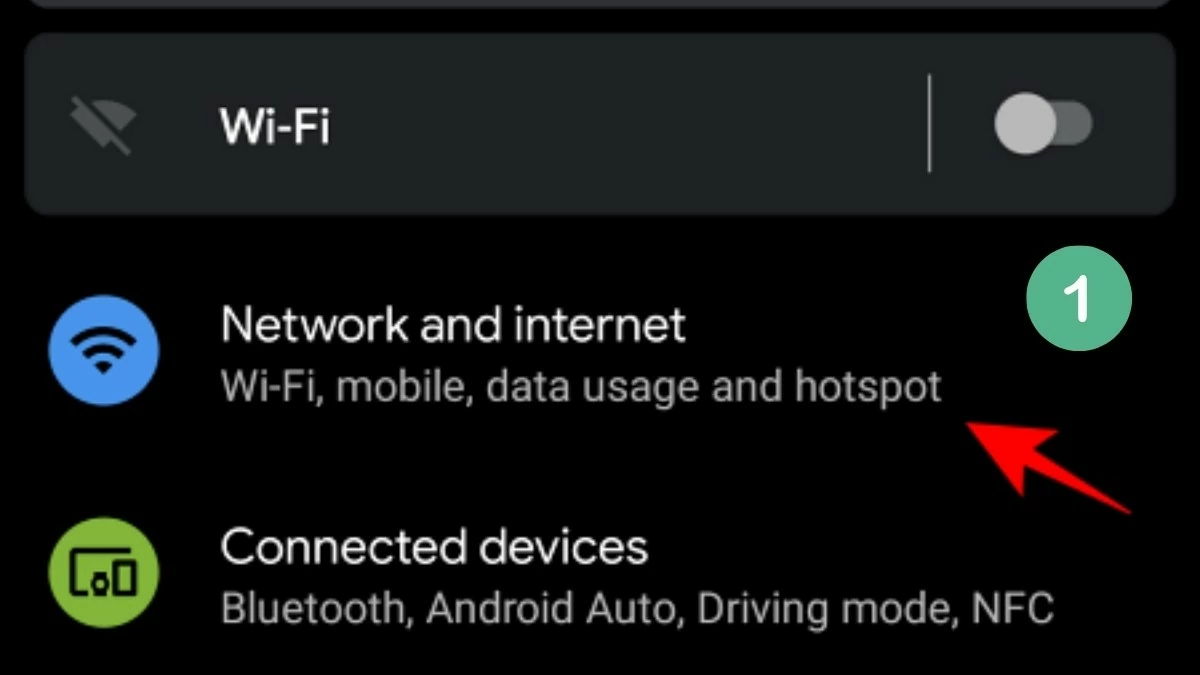
Step 1: Open Settings and tap on "Network & Internet."
 |
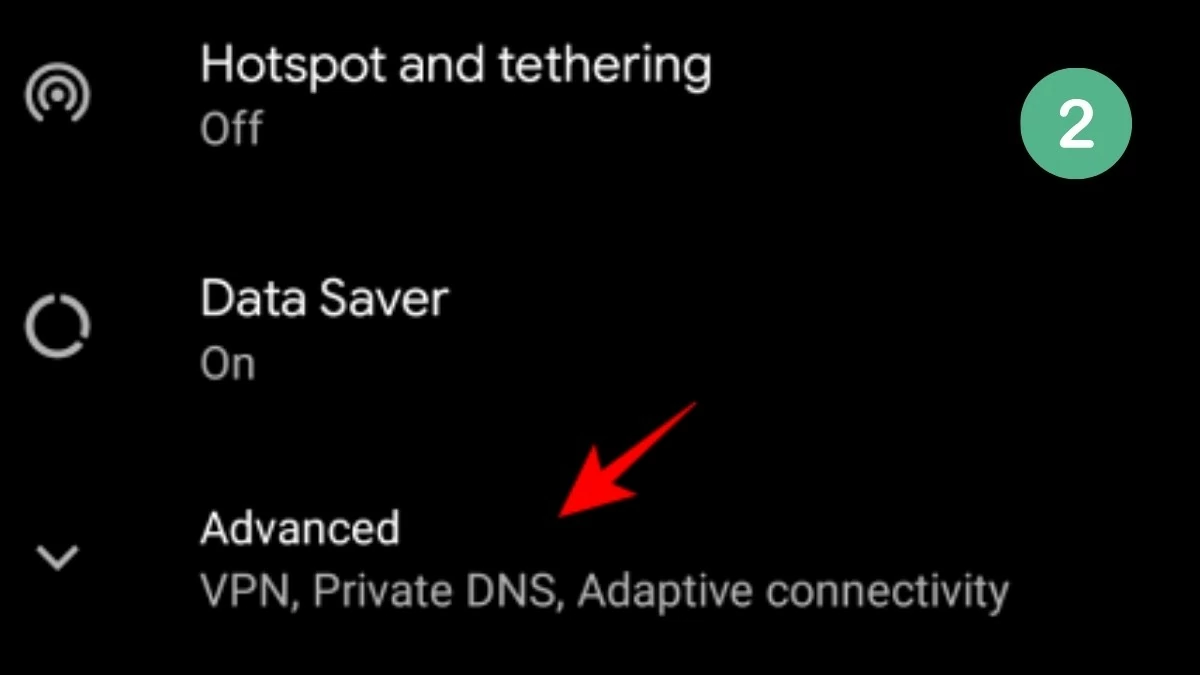
Step 2: Next, scroll down to the bottom and select "Advanced."
 |
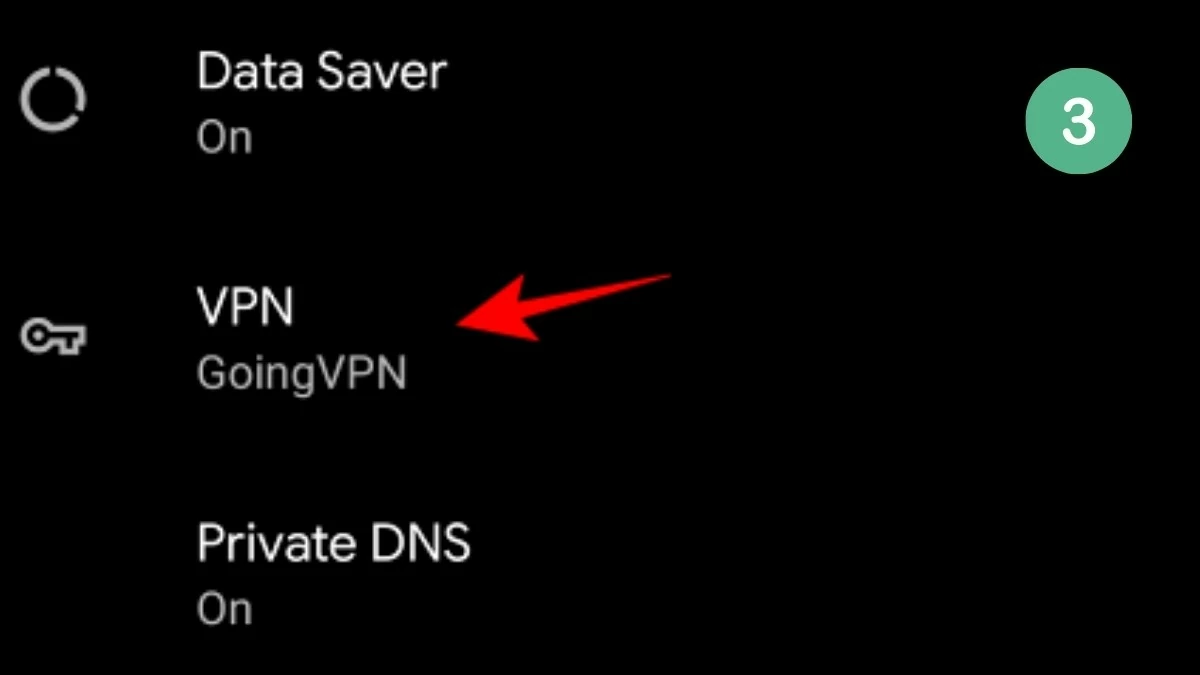
Step 3: Select "VPN."
 |
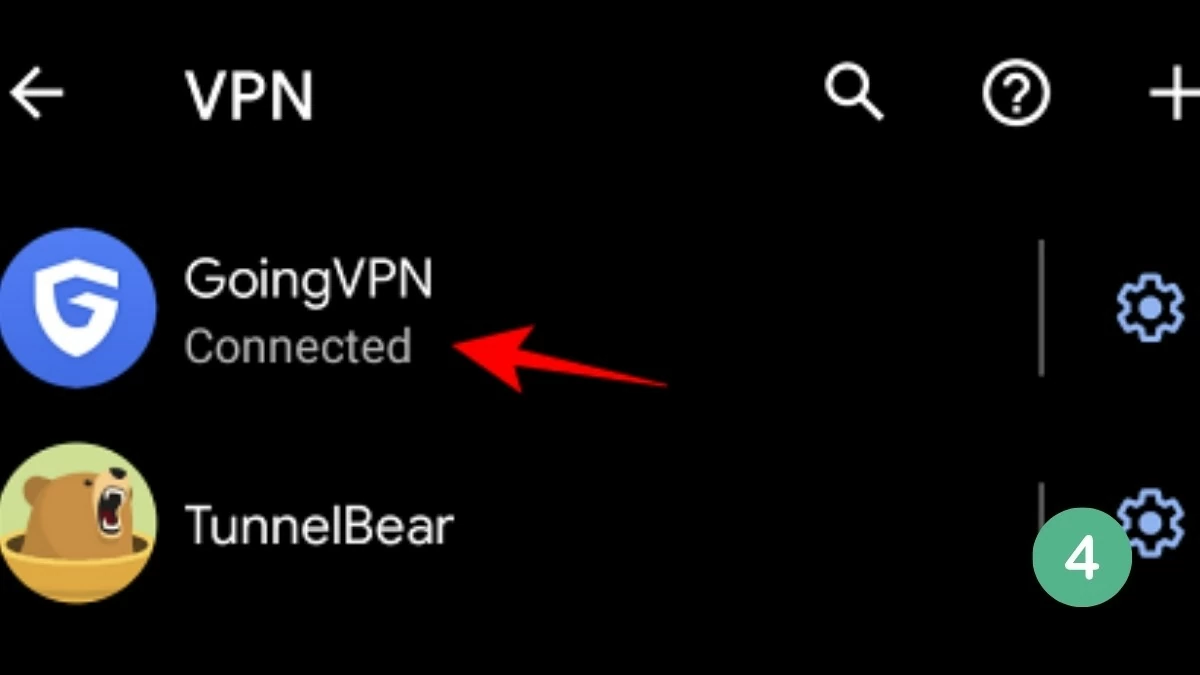
Step 4: Here, the list of virtual networks installed on the device will be displayed. To disconnect the current VPN network, tap on it.
 |
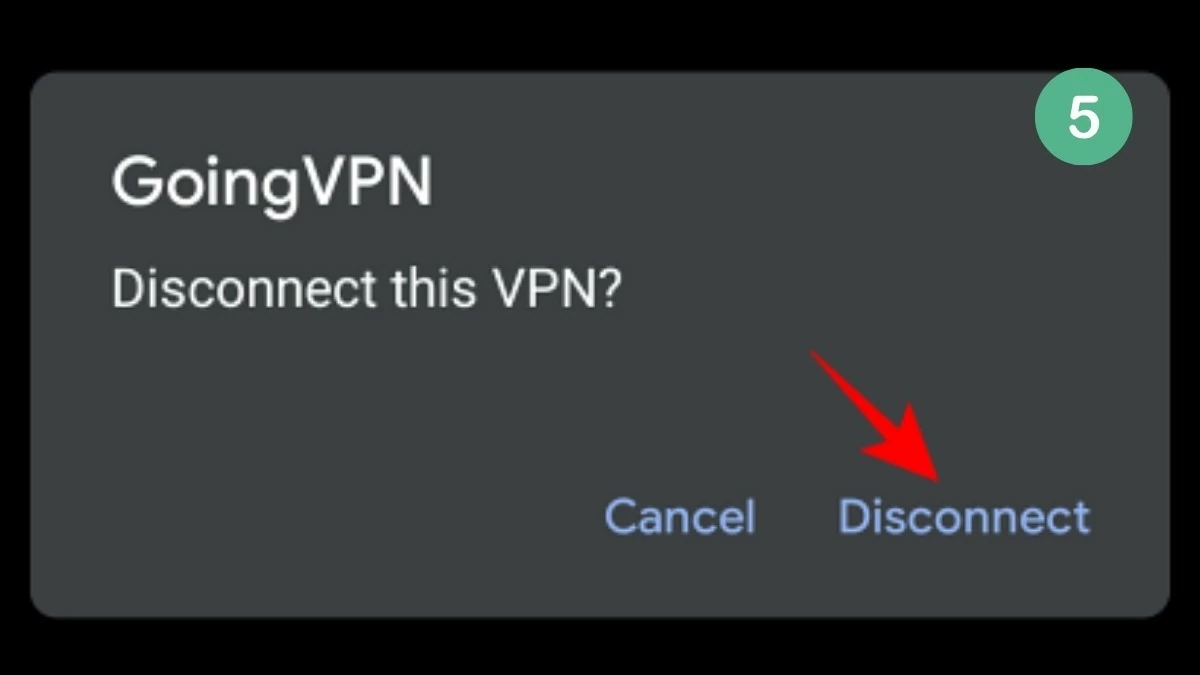
Step 5: Select "Disconnect."
 |
So your private network connection is turned off.
Turning on a VPN on your phone is the same as turning it off. Just go to Settings > Network & Internet > VPN, select the network you want to use, and tap "Connect."
How to enable VPN always connected mode easily
This is pretty simple, as devices running Android 7 and above have a built-in "Always-On VPN" feature. This feature automatically restores your connection if it drops. However, you'll need to enable it manually. Here's how to keep your VPN always on:
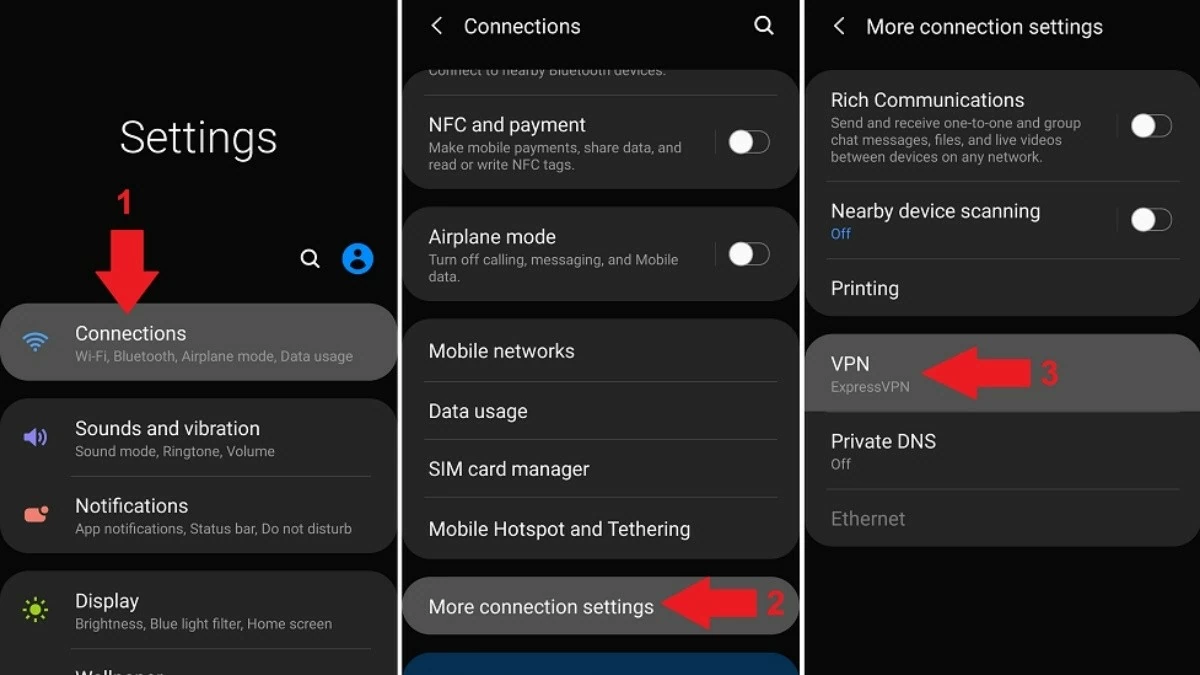
Step 1: First, open the Settings app and tap "Connections" (some devices may show it as "Wi-Fi & Networks," select this option and continue to Step 3).
Step 2: Find the “More connection settings” option and tap on it.
Step 3: Next, click on "VPN" as shown below.
 |
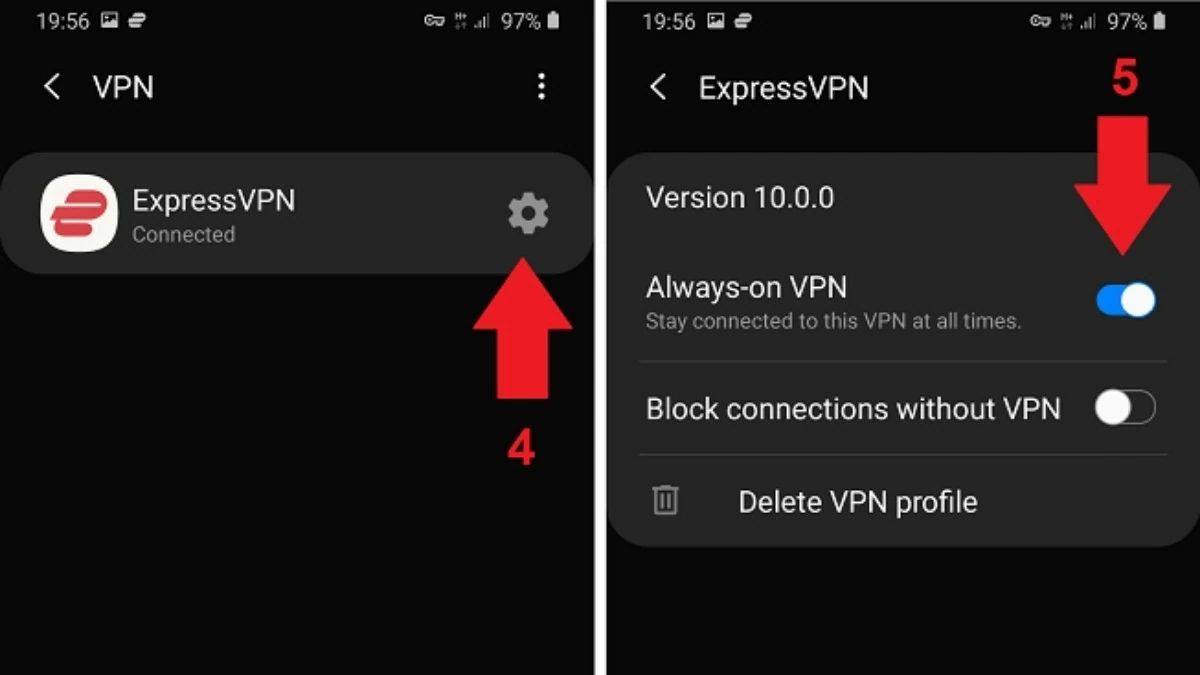
Step 4: Then, tap on the icon next to your VPN name.
Step 5: Finally, enable "Always-on VPN" and "Block non-VPN connections" (only applicable to Android 8 and above) to prevent apps from leaking data outside the tunnel.
 |
How to turn off VPN notifications
Keeping the VPN active is necessary, but it would be more convenient if it didn't appear constantly in the notification panel. To completely disable VPN notifications, you can prevent the app from accessing the notification panel.
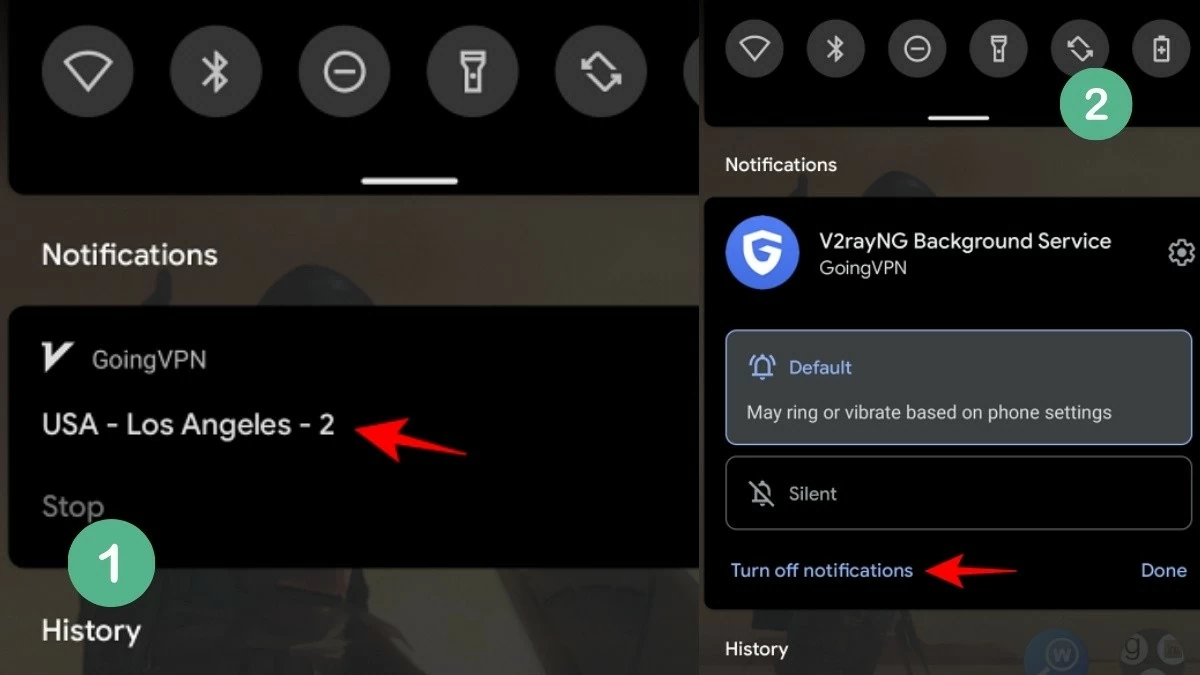
Step 1: First, swipe down to open the notification panel, then tap and hold on the VPN notification.
Step 2: Then, more options will appear. Select "Turn off notifications."
 |
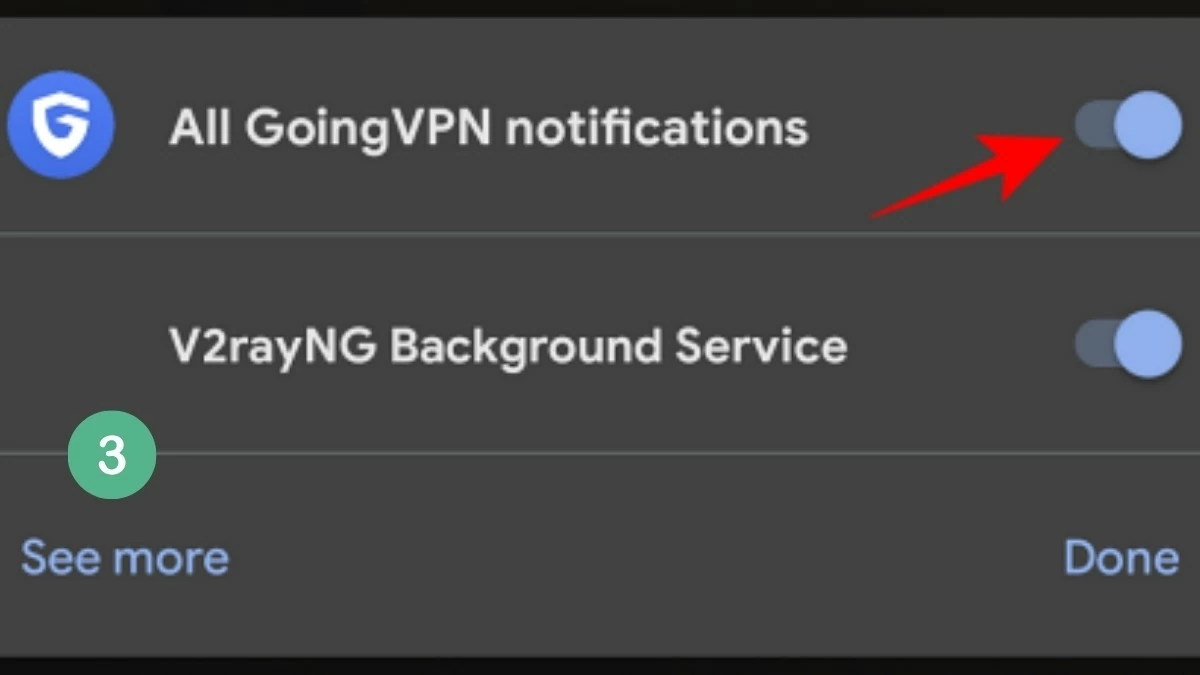
Step 3: Disable notification access for the VPN app.
 |
With the above instructions, you can easily install a VPN on your Android phone in just a few simple steps. Knowing how to use a VPN not only helps protect your personal data but also allows you to access a variety of global content. Activate now for a safer and smoother web browsing experience!
Source: https://baoquocte.vn/cach-su-dung-vpn-tren-dien-thoai-android-don-gian-va-nhanh-chong-289836.html




![[Photo] Overcoming the heat, practicing to prepare for the parade](https://vphoto.vietnam.vn/thumb/1200x675/vietnam/resource/IMAGE/2025/6/21/b93392e8da8243b8a32040d19590e048)


![[Maritime News] Wan Hai Lines invests $150 million to buy 48,000 containers](https://vphoto.vietnam.vn/thumb/402x226/vietnam/resource/IMAGE/2025/6/20/c945a62aff624b4bb5c25e67e9bcc1cb)


Comment (0)